CANine adapter
Introduction
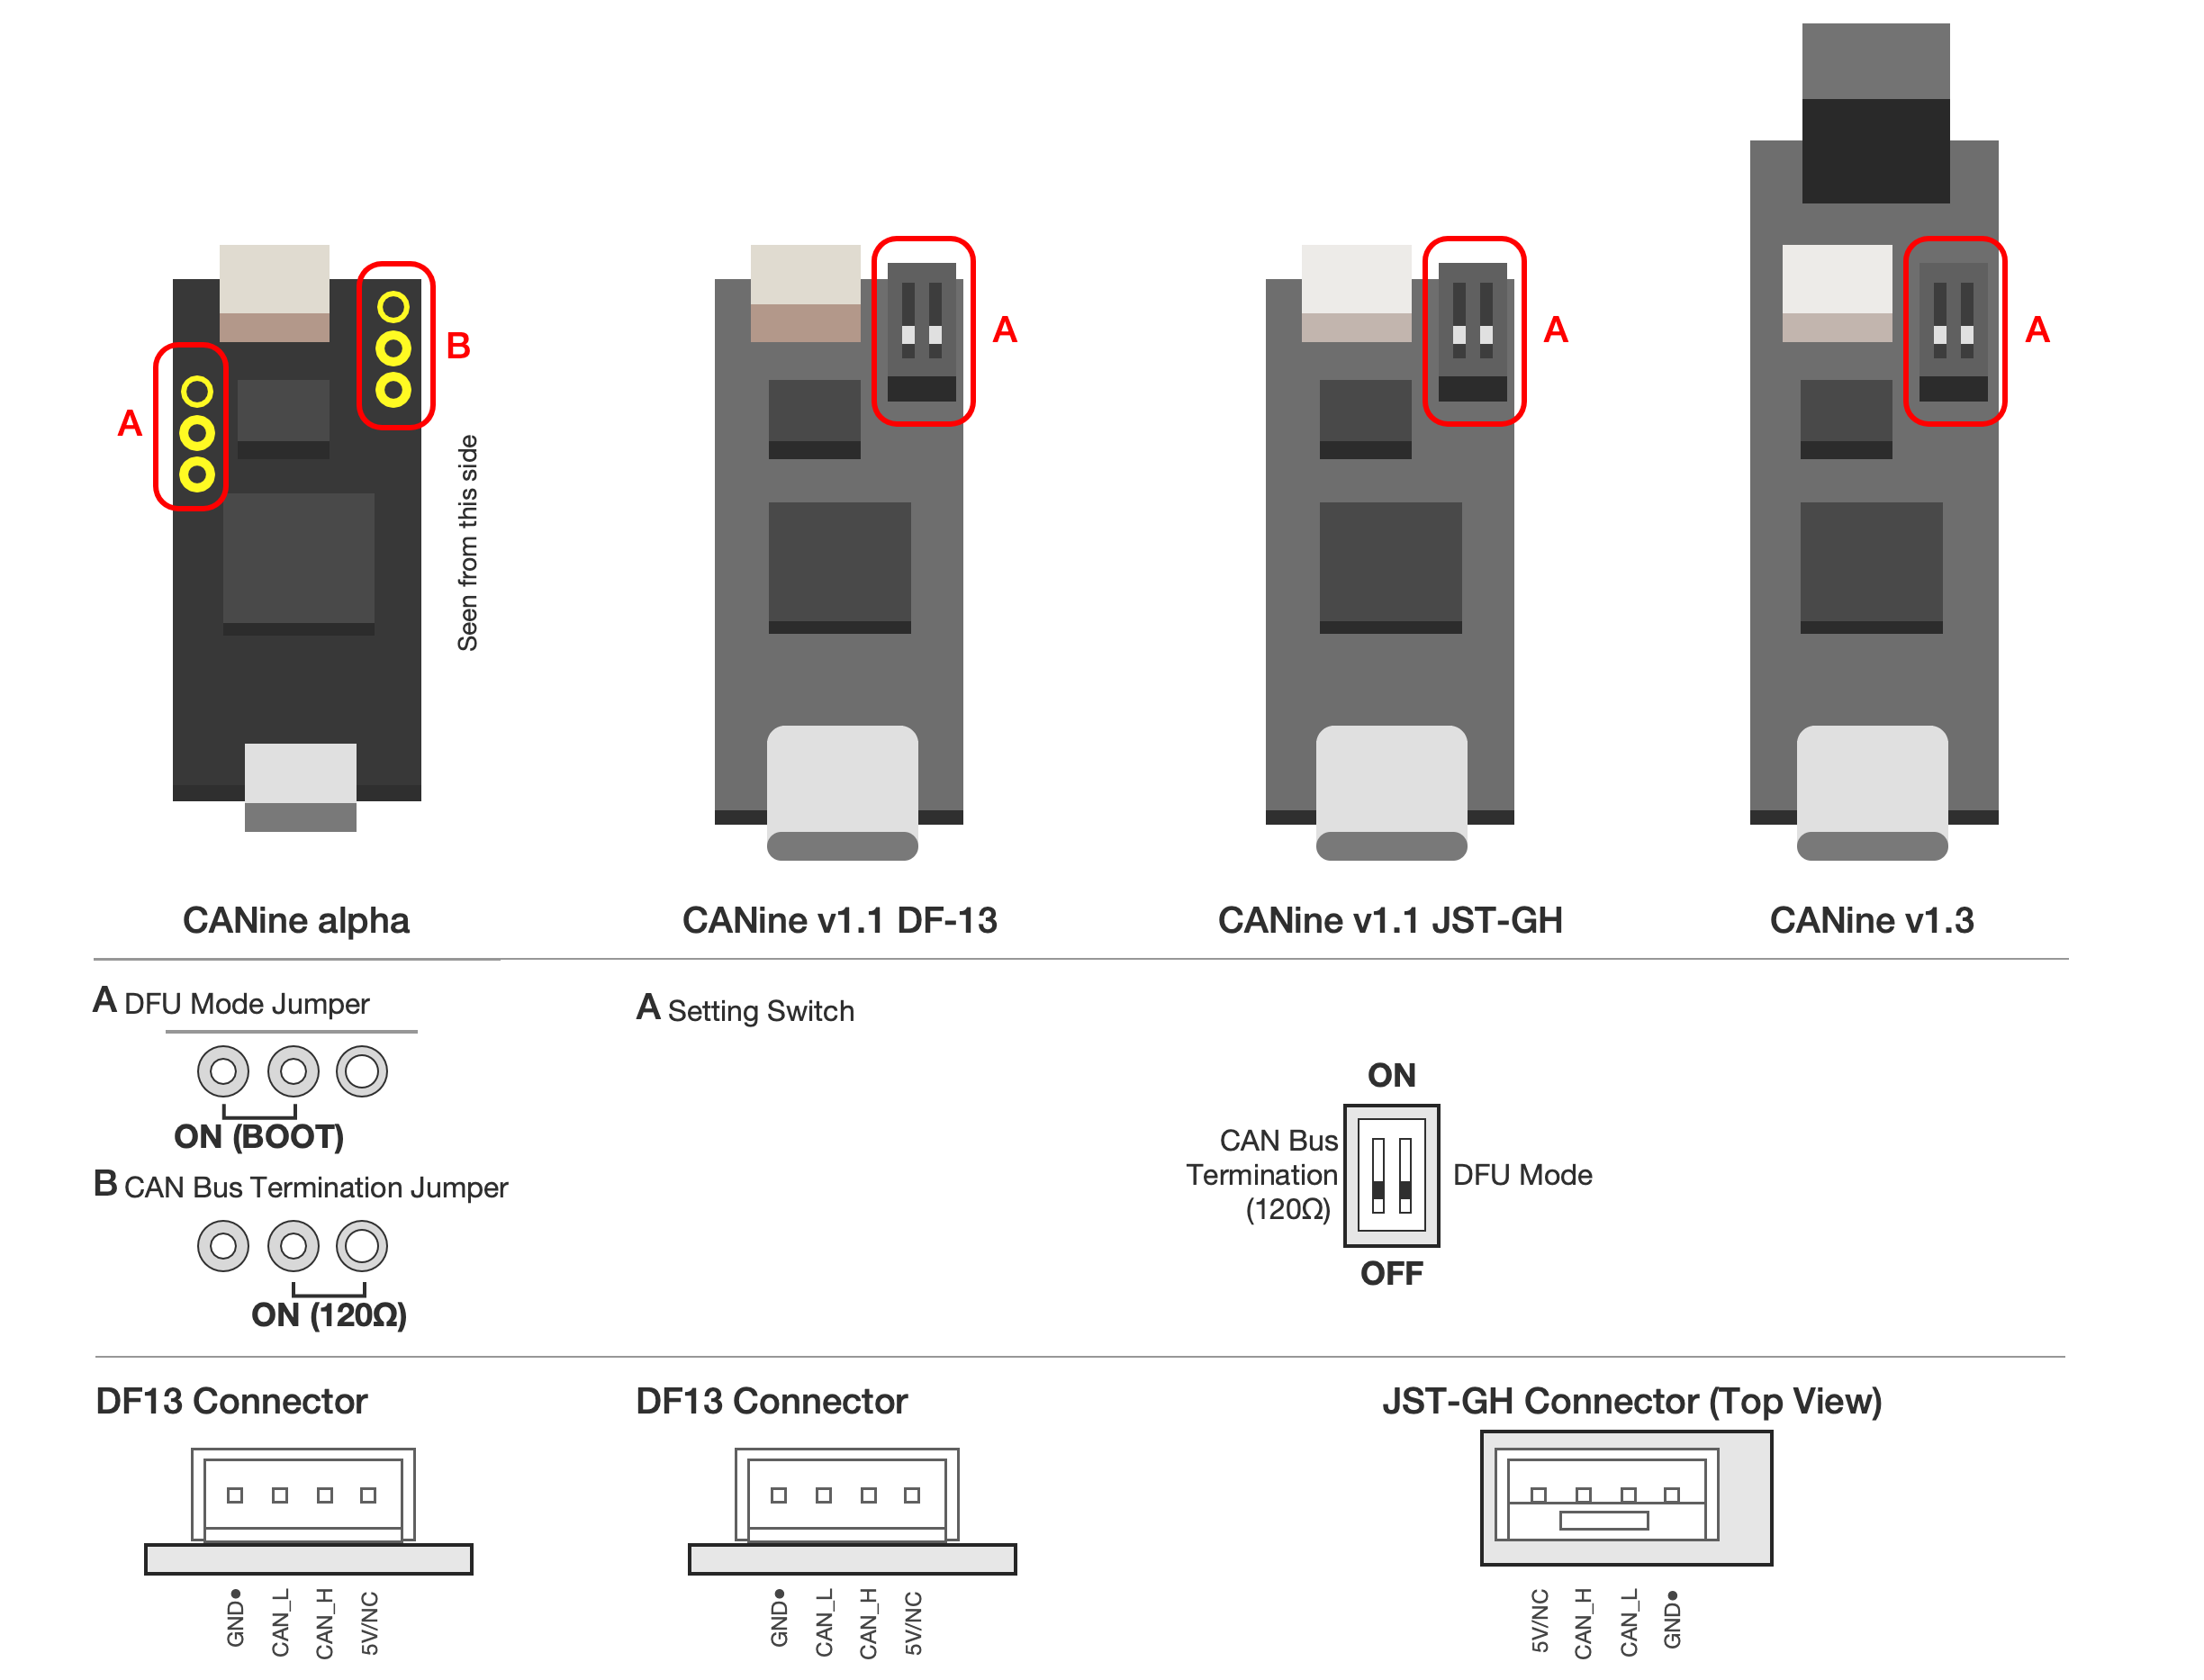
This is a USB Type-C <-> CAN Bus adapter. Itself it is an adaptation of the [CANable board](https://canable.io/). It features a 5.08mm screw terminal, a 4-pin JST-GH connector, and a 2.54mm header. In addition, it features a convenient DIP switch for setting CAN termination resistor and boot mode.
CANine includes the following hardware:
STM32F042C6 MCU
MCP2551 CAN Bus Transceiver
JST-GH/5.08mm Screw Terminal/2.54mm Pin header CAN interfaces
USB Type-C (v2) / micro (v1) interface
This design is Open Source, released under the original CANable license.
Hardware Configuration
Warning
Do not change the position of the DIP switches while the adapter is powered. First remove power, perform your change, and power back on.
CAN Termination Resistor
CANine includes a termination resistor to ease the setup of a CAN Bus network. If CANine is a terminal node in the network, you should enable the 120Ohm termination resistor via the onboard DIP switch. In small setups with a few nodes and short wires, it is enough to enable just a single termination resistor, either on the CANine or on a single Tinymovr.
Flashing Firmware
CANine comes pre-flashed with slcan.
Hardware Preparation
Unplug the CANine adapter from USB. Flip the DFU switch to the ON position. Plug the adapter back into USB. The device will appear as a ST DFU Device, and allow firmware flashing. Once firmware flashing is complete, unplug the device and return the switch to the OFF position.
CANine Firmware
To try the CANine firmware, we offer a simple Web-based firmware update service. Instructions are available on the page. Chrome and Edge are supported.
Python-Can Compatibility
We offer a python-can plugin available on PyPi, which allows use of CANine with python-can. The plugin is easily installable via pypi:
pip install python-can-canine
To use with Tinymovr Studio, add the command line parameter –bus=canine when launching.
In your scripts, use the CANine interface through a simple import:
import can
from canine import CANineBus

bus = can.Bus(interface="canine", bitrate=1000000)
Additional Windows Requirements
You will need to install the libusb driver for your CANine. This is most easily done using Zadig
Additional Macos Requirements
You will need to install libusb. This can be easily done using Homebrew:
brew install libusb
In ARM-based Macs you may also need to link the homebrew library install path to the fallback path /lib. This can be done with the following command:
ln -s /opt/homebrew/lib ~/lib
Additional Linux requirements
You will need to add udev rules for CANine:
sudo bash -c 'echo -e "SUBSYSTEM==\"usb\", ATTR{idVendor}==\"0483\", ATTR{idProduct}==\"c1b0\", MODE=\"0666\", SYMLINK+=\"canine_usb\"" > /etc/udev/rules.d/11-canine.rules'
sudo udevadm control --reload-rules && sudo udevadm trigger
To have the rules loaded at every boot, add the command to your .bashrc.
slcan & CANdlelight Firmware
CANine is compatible with both slcan as well as candlelight firmware. If you would like to revert to these firmwares, the easiest solution is to use the canable updater. Similarly to the CANine flasher, this updater works directly from within the browser. Chrome and Edge are supported.
3D Printed Case Assembly
